
Arduino
Seccions d'aquesta pàgina 9
01General#
- Arduino
- Arduino (wp)
- History
- Pinouts
- Arduino Board Pinout Diagrams (External Links)
- The unofficial Arduino Micro pinout diagram (flickr)
- The unofficial Arduino Leonardo pinout diagram (flickr)
- Arduino and Android
- GIMX (Playstation)
- Arduino and camera/webcam
- El hombre mecatrónico
- Make: Arduino Bots and Gadgets
- Make: Arduino Bots and Gadgets (O'Reilly)
- Arduino y Telefónica ponen fácil conectar al mundo cualquier objeto
- Arduino DIYDrones
- Orugas:Robot Arduino+orugas+pan&tilt+cámara inalambrica+ultrasonidos
- Arduino shield list
- The making of Arduino (IEEE Spectrum)
- Comercial / Commercial
- Brico Geek
- e-ika
- compatibles: CH340 en lloc de FT232RL
- Cooking Hacks
(Libelium)
- Arduino Mega ADK (51€)
- Juguetrónica
- Open Domo
- Projectes / Projects
02Maquinari / Hardware#
- Arduino Products
- Evolution of Arduino: the family tree
-
NOTES:
memory
USB
interface
features
preu
bits
freq
flash
SRAM
EEPROM
form factor
conn
controller
svg (Fritzing) models released
voltage
pinout
(luisllamas)
digital I/O
(PWM)
analog inputs
bluetooth
accel
WiFi
8
ATmega8
16MHz 8KB
arduino
Serial
Single-Sided Serial
USB
Extreme
NG
Severino (S3V3)
ATmega168
16KB
arduino
NG+
Bluetooth 2007
5V
Diecimila 2007
5V
Diecimilanove 2008
5V
16MHz
Pro
3.3V / 5V
other
Mini
Nano
8MHz
LilyPad 2007
2.7-5.5V
ATmega328
32KB
arduino
Duemilanove
5V
16MHz
arduino B

Atmega16U2 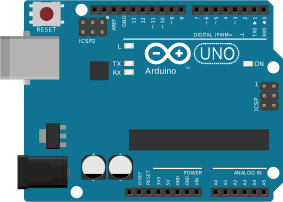
Uno
2010
pighixxx (fck)
bq (pdf)
14 (6)
6
Bluetooth
x
16MHz
arduino
Ethernet
2011
16MHz
other
-
-
Pro (Sparkfun: 5V)
3.3V / 5V
8MHz /
16MHz
32kB
2kB
1kB
18 x 33 mm
- - 
Pro Mini
(Sparkfun: 3.3V, 5V)
3.3V / 5V pighixxx (fck)
16MHz
2KB
1KB
(w/wo headers)
18 x 30 mm
- -
Mini 05
5V pighixxx (fck)
bq (pdf)
14 (6) 8
16MHz 32KB 2KB 1KB (with headers)
18 x 45 mmmini

Nano
(replaced by Nano Every)
2008
5V
22 (6)
8
-
-
8MHz
Fio
2010
3.3V
8MHz
LilyPad
2.7-5.5V
LilyPad Simple
LilyPad Simple Snap
ATmega32u4
16MHz 32KB
arduino micro

integrated
Leonardo
2012
5V pighixxx (fck)
2.5KB
1KB
(w/wo headers)
18 x 48 mm
micro
integrated 
Micro
5V pighixxx (fck)
20
12
LilyPad USB
16MHz 32KB
Esplora
2012
5V pighixxx (fck)
ATmega32u4
Atheros AR933116MHz
400MHz
32KB
16MB
arduino
Yún 2013
5V
ATmega4809
48KB 6KB
256 bytes
18 x 45 mm micro
ATSAMD11D14A fzpz
Nano Every
(replaces Nano)2020 5V pdf
pdf
- 7,40€+IVA = 8,95€ (wo/h)
- 13,00€+IVA=15,73€ (w/h)
- (3/6 pack)
- 13,92€ (wo/h)
- 16,90€ (w/h)
ATmega1280 16MHz 128KB
mega
Mega
5V
ATmega2560
16MHz 256KB 8KB
4KB
mega B
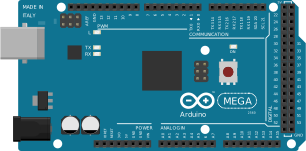
Mega2560
2010
5V pighixxx (fck)
bq (pdf)
54 (15)
16
Mega2560 Wifi R3
ESP8266EX
16MHz 256KB
mega
ADK
2011
5V
32
ATSAM3X8E
84MHz
512KB
mega
Due
2012
3.3V graynomad (forum)
32 ATSAMD21G18A 48MHz 256KB
arduino
Zero
2015
3.3V
32 Intel Curie
32MHz
196KB
arduino
Genuino 101
2015
3.3V
LE
6-axis
ATSAMW25 48MHz 256KB
MKR1000 ?
3.3V
RP2040 (Arm Cortex M0+) 133MHz 2MB 264kB
USB 1.1
Raspberry Pi Pico
pdf
bits
freq flash SRAM EEPROM form factor conn controller
models released voltage pinout digital I/O
(PWM)analog inputs bluetooth accel
preu Aquesta taula continua cap a la dreta — desplaça-la o gira el mòbil.
- superseded
- Starter kit
- Adaptadors USB / USB adapters (comunicació
sèrie / serial communication)
- Conversor
Serie-USB FTDI232 (to use with e.g.: Pro, Pro Mini,
Mini 05, ...)
- Sparkfun FTDI Basic Breakout - 5V (DEV-09716) (miniUSB)
- SparkFun FT231X Breakout (BOB-13263) (microUSB)
- Conversor
Serie-USB FTDI232 (to use with e.g.: Pro, Pro Mini,
Mini 05, ...)
03Alimentació / Power supply#
- (Locoduino)
-
Uno
Mega
Nano
Nano Every Pro Mini
(5V model)
Pro Mini
(3.3V model)
input
unregulated
input for onboard regulator
jack 2.1 or "Vin": 7-12V DC jack 2.1 or "Vin": 7-12V DC "VIN" (pin 30): 6-20V "VIN": 7-21V DC "RAW": 7-12V DC "RAW": 7-12V DC USB
B
B
mini-B
micro-B
(from FTDI adapter)
(from FTDI adapter) regulated 5V (3.3V in certain models)
-
-
"5V" (pin 27): 5V
"VCC": 5V
"VCC": 3.3V output
5V
output of onboard regulator
"5V"
"5V" "5V" (pin 27): 5V "+5V" "VCC": 5V
3.3V 50mA
output of onboard regulator "3.3V"
"3.3V" 3.3V (pin 17)
"+3V3"
"VCC": 3.3V
IOREF
voltage reference with which the microcontroller operates
x
"IOREF"
REF (pin 16)
Aquesta taula continua cap a la dreta — desplaça-la o gira el mòbil.
04Interfícies / Interfaces#
- SPI (Serial Peripheral Interface)
- Info
- Pinout:
group
Name
Alt names
Description
PIN in Arduino
biblioteques SPI / SPI libraries
SPI-3W SPI-4W
ICSP Uno
Adafruit_SH1106
Adafruit-GFX-Library
u8glib u8g2
u8g()
x
x
SCLK
CLK/SCK/D0
Clock
3
D13 (hw, fixed)
U8glib sck
U8g2 clock
MISO
SDO/DOUT
Master In Slave Out
1
D12 (hw, fixed)
x
x
MOSI
SDI/DIN/D1/Data
Master Out Slave In
4
D11 (hw, fixed)
U8glib mosi
U8g2 data
x
x
SS
CS/SDA
Slave/Chip Select
D10 (hw, fixed)
(Arduino as a slave)
x
RS DC Mode: Command/Data
D9 (sw, defined)
U8glib a0 U8g2 dc
RES
RST/REST/RES
Controller Reset
D8 (sw, defined)
VCC
GND
Aquesta taula continua cap a la dreta — desplaça-la o gira el mòbil.
- Maquinari / Hardware
- Biblioteques / Libraries
- I2C (Inter-Integrated Circuit)
- Info
- Pinout:
Name
Alt names
Description
PIN
Uno
SDA
Data
SDA, A4
SCL
Clock
SCL, A5
Aquesta taula continua cap a la dreta — desplaça-la o gira el mòbil.
- Maquinari / Hardware
05Desenvolupament / Development#
- Getting
started with Arduino and Genuino products
- Getting
Started
with the Arduino Leonardo, Leonardo ETH and Micro
lsusbID 2341:8037 Arduino SA
- Getting
Started
with the Arduino Leonardo, Leonardo ETH and Micro
- Arduino software
- Program
- Arduino cheat sheet
- structure (.ino file)
setup()loop()
- Serial.print
- binary with all 8 digits
- Monitoratge sèrie / Serial monitor
(without IDE; or monitoring a
second Arduino)
- Use Unix terminal instead of the Monitor on Arduino IDE
- using screen
- Screen Command: Set Baud Rate [ Terminal Communication ]
-
model command Arduino Every Nano, Mega 2560
ESP32screen /dev/ttyACM0 115200Arduino Nano screen /dev/ttyUSB0 115200Aquesta taula continua cap a la dreta — desplaça-la o gira el mòbil.
- miniterm (ESP32)
source
                          ~/.espressif/python_env/idf5.?_py3.*_env/bin/activate
python ~/.espressif/python_env/idf5.2_py3.10_env/lib/python3.10/site-packages/serial/tools/miniterm.py /dev/ttyACM0115200miniterm.py /dev/ttyACM0 115200- ENTER
help()- Welcome to MicroPython on the ESP32!
soft reboot: CTRL+D- to exit:
CTRL+]
- using
idf.py(ESP32 and ESP-IDF)idf.py -p /dev/ttyACM0 monitor
- IDE
- Arduino IDE
- PlatformIO
- built on top of Microsoft's Visual Studio Code
- Sloeber (standalone and as an Eclipse plugin)
- Eclipse
- Sloeber, the Arduino Plugin for Eclipse
- Sloeber / arduino-eclipse-plugin
- Install
- from Marketplace
- Emacs
- ArduinoSupport (Emacs wiki)
- arduino-mode
- Instal·lació
- MELPA
M-x list packagesarduino-mode
- MELPA
- Instal·lació
- Connexió USB / USB connection
- afegiu el vostre usuari al grup dialout (grup propietari
de /dev/ttyUSBxx) / add your user to group dialout (group
owner of /dev/ttyUSBxx):
sudo usermod -a -G dialout my_usernewgrp dialout
journalctl -f- connecteu la placa / connect your board
- NodeMCU
- CH340
de gen. 11 18:52:16 localhost kernel: usb 1-2: ch341-uart converter now attached to ttyUSB0
- CH340
lsusb- Arduino
- Nano:
ID 0403:6001 Future Technology Devices International, Ltd FT232 Serial (UART) IC
- Nano:
- NodeMCU
- CH340:
ID 1a86:7523 QinHeng Electronics HL-340 USB-Serial adapter
- CH340:
- Arduino
- afegiu el vostre usuari al grup dialout (grup propietari
de /dev/ttyUSBxx) / add your user to group dialout (group
owner of /dev/ttyUSBxx):
- Arduino IDE
- Software
- Instal·lació / Installation
- 2.x
- download nighty build arduino-ide_nightly-yyyymmdd_Linux_64bit.AppImage
chmod +x arduino-ide_nightly-yyyymmdd_Linux_64bit.AppImage./arduino-ide_nightly-yyyymmdd_Linux_64bit.AppImage
- 1.x
- Install
the Arduino Software (IDE) on on Linux
tar xvf arduino-1.8.19-linux64.tar.xzcd arduino-1.8.19sudo ./install.sh- will create shortcut in desktop
- will create a symbolic link at /usr/local/bin/arduino
- Install
the Arduino Software (IDE) on on Linux
- Problemes / Problems
- ...
- 2.x
- Fitxers de configuració
- 2.x
- ~/.arduino15/preferences.txt
- 1.x
- ...
- 2.x
- Configuració / Setup
- 2.x
- ~/.arduino15/
- it will be created and populated the first time that IDE is launched
- ~/.arduinoIDE/
- ~/.config/
- Arduino IDE/
- arduino-ide/
- ~/.arduino15/
-
boards info File -> Preferences -> Settings -> Additional boards manager URLs: Tools -> Board -> Boards Manager...
will install to:
~/.arduino15/packages/Arduino
ESP8266 https://arduino.esp8266.com/stable/package_esp8266com_index.json
ESP32 - Getting Started (Espressif Arduino-ESP32)
- Quick Start (T-Display S3)
https://raw.githubusercontent.com/espressif/arduino-esp32/gh-pages/package_esp32_index.json"esp32 by Espressif Systems" esp32/hardware/esp32/2.0.5/libraries/... Aquesta taula continua cap a la dreta — desplaça-la o gira el mòbil.
- 2.x
- Ús / Usage (Arduino IDE 2.x)
- File
- Sketchbook (from ~/Arduino/)
- Examples
- Built-in Examples
- Examples for ... (selected board) (from
~/.arduino15/...)
- Examples for ESP32S3 Dev Module
- ...
- WebServer (~/.arduino15/packages/esp32/hardware/esp32/2.0.6/libraries/WebServer/examples/)
- ...
- Examples for ESP32S3 Dev Module
- Examples from Custom Libraries (from ~/Arduino/libraries/)
- Editor
- ...
- Verifica
- If your sketch doesn't compile
- Ctrl + click sobre l'error
- ...
- ESP32
- Install board
- Setup
- select "ESP32S3 Dev Module"
- Tools (Arduino
IDE Tools Menu)
- USB CDC On Boot: "Enable"
- Flash Size: "16MB (128Mb)"
- Partition Scheme: "Huge APP (3MB No OTA/1MB SPIFFS)"
- PSRAM: "OPI PSRAM"
- Install libraries
- TFT_eSPI you should use TFT_eSPI provided by LilyGO. If you use official library (e.g. version ...) you will get a black screen. IMPORTANT: be careful that official library is not installed as an automatic upgrade.
- File
- Ús / Usage (Arduino IDE 1.x)
- Arrencada / Start
- des de la icona de l'escriptori / from desktop
icon
- prèviament heu d'haver executat install.sh / previous ./install is required
- from command line
arduino(in /usr/local/bin/arduino)
- des de la icona de l'escriptori / from desktop
icon
- Tools
- Placa: ...
- Port: /dev/ttyUSB0
- Preferències / Preferences
- Temes / Themes
- 15 Best Arduino Themes
- Arduino
Dark Theme
cd ~/Arduino(Sketchbook location)mkdir theme && cd themewget https://github.com/taunoe/arduino-dark-theme/raw/master/tauno-dark-theme.zip- Arduino IDE:
- Fitxer -> Preferències -> Theme: Tauno Dark Theme ...
- cal reiniciar l'IDE
- Dark Theme for Arduino IDE (old)
- Utilitza un editor extern / Use an exteral editor
- Es pot fer servir qualsevol editor per a editar el fitxer (p.ex. emacs), i l'IDE per a verificar-lo i pujar-lo
- Temes / Themes
- Editor
- ...
- Verifica
-
- ...
-
- Program
- Eines -> Informació de la placa
- Obre (4a icona)
- Basics -> Blink
- crearà el codi font:
- Blink.ino
- Fitxer -> Sketchbook
- projectes propis, desats a ~/Arduino/ (es pot canviar a Fitxer->Preferències->Ubicació del Sketchbook)
- Esbós -> Verifica/Compila
- crearà
- Blink.ino.hex
- ...
- crearà
- Esbós -> Puja
- Problemes /
Problems
PORTS {} / {} => {}
Couldn't find a Board on the selected port. Check that you have the correct port selected. If it is correct, try pressing the board's reset button after initiating the upload.- Solució / Solution
- Segurament es tracta d'una placa ATmega32u4 (Micro, Leonardo)
- Mentre apareixen les línies «
PORTS {} / {} => {}», premeu dues vegades ràpidament el botó físic de la placa - ...
- Solució / Solution
avrdude: jtagmkII_getsync(): sign-on command: status -1- Workaround
- pugeu blink. Us apareixerà el
missatge «
Cannot locate "flash" and "boot" memories in description», però haurà funcionat - ara torneu a pujar l'esbós que voleu pujar
- pugeu blink. Us apareixerà el
missatge «
- Workaround
avrdude: jtagmkII_initialize(): Cannot locate "flash" and "boot" memories in description- Només és un avís que es pot ignorar / Just a warning. Can be safely ignored.
- Problemes /
Problems
- Arrencada / Start
- Problemes / Problems
ModuleNotFoundError: No module named 'serial'- Solució / Solution
sudo dnf install python3-serial
- Solució / Solution
- Command line
- arduino-cli
arduino-1.8.5/hardware/tools/avr/bin- See detailed logs when using Upload button on Arduino IDE:
/disc/Baixades/arduino-1.8.5/arduino-builder \
-compile \
-logger=machine \
-hardware /disc/Baixades/arduino-1.8.5/hardware \
-tools /disc/Baixades/arduino-1.8.5/tools-builder \
-tools /disc/Baixades/arduino-1.8.5/hardware/tools/avr \
-built-in-libraries /disc/Baixades/arduino-1.8.5/libraries \
-libraries /home/cesc/Arduino/libraries \
-fqbn=arduino:avr:micro \
-vid-pid=0X2341_0X8037 \
-ide-version=10805 \
-build-path /tmp/arduino_build_595924 \
-warnings=all \
-build-cache /tmp/arduino_cache_334524 \
-prefs=build.warn_data_percentage=75 \
-prefs=runtime.tools.arduinoOTA.path=/disc/Baixades/arduino-1.8.5/hardware/tools/avr \
-prefs=runtime.tools.avrdude.path=/disc/Baixades/arduino-1.8.5/hardware/tools/avr \
-prefs=runtime.tools.avr-gcc.path=/disc/Baixades/arduino-1.8.5/hardware/tools/avr \
-verbose \
/disc/Baixades/arduino-1.8.5/examples/01.Basics/Blink/Blink.ino/disc/Baixades/arduino-1.8.5/hardware/tools/avr/bin/avrdude \
-C/disc/Baixades/arduino-1.8.5/hardware/tools/avr/etc/avrdude.conf \
-v \
-patmega32u4 \
-cavr109 \
-P/dev/ttyACM0 \
-b57600 \
-D \
-Uflash:w:/tmp/arduino_build_595924/Blink.ino.hex:i
- Compile (.ino -> .hex) using arduino-builder:
- arduino-builder ...
- Upload (.hex file) to Arduino using avrdude:
- AVR Tutorial: Starting out with avrdude
export ARDUINO_ROOT=/disc/Baixades/arduino-1.8.13- Problemes / Problems
avrdude: butterfly_recv(): programmer is not responding- Solució / Solution
- Arduino IDE
does it correctly:
Forcing reset using 1200bps open/close on port /dev/ttyACM0
- Arduino Leonardo upload from Makefile
- How can I force a Leonardo to reset with avrdude?
- Si la placa és una Leonardo/Micro, el procés s'ha de fer en dues fases: posar el xip en bootloader (2 options: set it to 1200 baud with stty; or quickly double press the hardware reset button) i pujar el codi amb avrude
- desconnecteu el cable USB; torneu a
connectar-lo
- opció 1 (all software):
export ARDUINO_ROOT=/disc/Baixades/arduino-1.8.13stty -F /dev/ttyACM0 1200 && sleep 1 && ${ARDUINO_ROOT}/hardware/tools/avr/bin/avrdude -C${ARDUINO_ROOT}/hardware/tools/avr/etc/avrdude.conf -v -patmega32u4 -cavr109 -P/dev/ttyACM0 -b57600 -D -Uflash:w:/tmp/arduino_build_979439/Blink.ino.hex:i
- opció 2 (hardware + software):
- premeu ràpidament dues vegades el
botó físic de reset de la placa: la
placa es posarà en mode bootloader
(led de la placa en parpelleig ràpid)
durant uns 8 segons; durant aquest
temps executeu el pas número 2 / quick
double press the physical hardware
reset button: th board will be in
bootloader mode (quick flash of board
led) for about 8 seconds; inside this
period of time, perform the step
number 2
- si durant aquests 8 segons feu
lsusbID 2a03:0037 dog hunter AG Arduino Micro (bootloader)
- si durant aquests 8 segons feu
${ARDUINO_ROOT}/hardware/tools/avr/bin/avrdude -C${ARDUINO_ROOT}/hardware/tools/avr/etc/avrdude.conf -v -patmega32u4 -cavr109 -P/dev/ttyACM0 -b57600 -D -Uflash:w:/tmp/arduino_build_979439/Blink.ino.hex:i
- premeu ràpidament dues vegades el
botó físic de reset de la placa: la
placa es posarà en mode bootloader
(led de la placa en parpelleig ràpid)
durant uns 8 segons; durant aquest
temps executeu el pas número 2 / quick
double press the physical hardware
reset button: th board will be in
bootloader mode (quick flash of board
led) for about 8 seconds; inside this
period of time, perform the step
number 2
- Arduino IDE
does it correctly:
- Solució / Solution
- arduino-cli
- Biblioteques / Libraries
- Pantalles / Screens
- Adafruit_SH1106
- Adafruit-GFX-Library
- ArduiPi_OLED
- u8glib (obsolete)
- u8g2
- Pantalles / Screens
- Exemples / Examples
- Starter kit
- The Arduino playground
- Tutorials
- Foundations
and More
- Introduction
- Language Reference
Functions Digital I/O - digitalRead()
- digitalWrite()
- pinMode()
Analog I/O - analogRead()
- analogReference()
- analogWrite()
Zero, Due & MKR Family - analogReadResolution()
- analogWriteResolution()
Advanced I/O - noTone()
- pulseIn()
- pulseInLong()
- shiftIn()
- shiftOut()
- tone()
- square wave
Time - delay(ms)
- delayMicroseconds()
- micros()
- overflow every 70 minutes
- millis()
- overflow every 50 days
Math - abs(x)
- constrain(x, a, b)
- map(value, fromLow, fromHigh, toLow, toHigh)
- max(x, y)
- min(x, y)
- pow(base, exponent)
- sq(x)
- sqrt(x)
Trigonometry - cos(rad)
- sin(rad)
- tan(rad)
Characters - isAlpha()
- isAlphaNumeric()
- isAscii()
- isControl()
- isDigit()
- isGraph()
- isHexadecimalDigit()
- ilLowerCase()
- isPrintable()
- isPunct()
- isSpace()
- isUpperCase()
- isWhiteSpace()
Random Numbers - random()
- randomSeed()
Bits and Bytes - bit()
- bitClear()
- bitRead()
- bitSet()
- bitWrite()
- highByte()
- lowByte()
External Interrupts - attachInterrupt()
- detachInterrupt()
Interrupts - interrupts()
- noInterrupts()
Communication - Serial
- if(Serial), ..., print(), println(), write(), ...
- SPI
- #include <SPI.h>
- Arduino & Serial Peripheral Interface (SPI)
- Stream
- available(), read(), flush(), ...
- Wire (I2C: SDA, SCL)
- #include <Wire.h>
- begin(), end(), ...
USB - Keyboard
- Mouse
Variables Constants - HIGH | LOW
- INPUT | OUTPUT | INPUT_PULLUP
- InputPullupSerial
- OUTPUT: <40mA
- LED_BUILTIN
- usually: pin 13
- true | false
- Integer Constants
n = 101; // decimaln = 0b101; // binaryn = 0101;// octaln = 0x101;// hexadecimal- n
= 33u
;// unsigned - n
= 100000L
;// long - n
= 32767ul
;// unsigned long
- Floating Point Constants
float n = 0.005
Conversion - (insigned int)
- (unsigned long)
- byte()
- char()
- float()
- int()
- long()
- word()
Data Types - array
- bool
- boolean
- byte
- char
- double
- float
- int
- long
- short
- size_t
- string
- String()
- String stringOne = "Hello String";
- String stringOne = String(255, BIN)
- ...
- Functions
- charAt(), compareTo(), ...
- Operators
- [], +, ==, ...
- unsigned char
- unsigned int
- unsigned long
- void
Variable Scope & Qualifiers - const
- cannot be modified
- scope
- static
- visible to only one function
- persist between function calls
- volatile
- load the variable from RAM instead of storage register
Utilities - PROGMEM
- store data in flash (program) memory instead of SRAM
- Arduino Memory Guide
- F() macro
- Serial.print(F("Write something on the Serial Monitor that is stored in FLASH"));
- sizeof()
Structure Sketch (C++) - setup()
- run once
- loop()
Control Structure - break
- continue
- do...while
- else
- for (initialisation; condition; increment)
- goto
- if
- return
- switch...case
- while
Furher Syntax - #define
- #include
- #include <LibraryFile.h>
- AVR C libraries: avr-libc
- other installed libraries
- #include "LocalFile.h"
- files in the sketch folder
- #include <LibraryFile.h>
- /**/
- //
- ;
- {}
Arithmetic Operations - % (remainder)
- *
- +
- -
- /
- =
Comparison Operators - !=
- <
- <=
- ==
- >
- >=
Boolean Operators - !
- &&
- ||
Pointer Access Operators - & (the address of ...)
- * (the value of address ...)
Bitwise Operators - & (AND)
- << (left shift)
- >> (right shift)
- ^ (XOR)
- | (OR)
- ~ (NOT)
Compound Operators - %=
- &=
- *=
- ++
- x++; // increment x by one and returns the old value of x
- ++x; // increment x by one and returns the new value of x
- +=
- --
- x--; // decrement x by one and returns the old value of x
- --x; // decrement x by one and returns the new value of x
- -=
- /=
- ^=
- |=
Aquesta taula continua cap a la dreta — desplaça-la o gira el mòbil.
- Language Reference
- Introduction
- Built-In Examples
- Examples from Libraries
- Tutorials on Arduino Project Hub
- Foundations
and More
- Tutoriales y proyectos con Arduino (Naylamp)
- Pantalles / Screens
- LCD IIC (LCM1602)
- Adafruit
(Pantalla
OLED 1.3' SH1106 128x64)
- u8g2
- Hardware SPI (use specific connections:
D13-SCLK--CLK, D11-MOSI--MOSI)
- U8G2_SH1106_128X64_NONAME_1_4W_HW_SPI(rotation, cs, dc [, reset])
- U8G2_SH1106_128X64_NONAME_2_4W_HW_SPI(rotation, cs, dc [, reset])
- U8G2_SH1106_128X64_NONAME_F_4W_HW_SPI(rotation, cs, dc [, reset])
- Software SPI (use specified pins: clock, data)
- U8G2_SH1106_128X64_NONAME_1_4W_SW_SPI(rotation, clock, data, cs, dc [, reset])
- U8G2_SH1106_128X64_NONAME_2_4W_SW_SPI(rotation, clock, data, cs, dc [, reset])
- U8G2_SH1106_128X64_NONAME_F_4W_SW_SPI(rotation, clock, data, cs, dc [, reset])
- Modes
-
mode
pros
cons
constructor
example
page buffer (picture loop)
- all graphics
- llittle RAM
- slow
1
void setup(void) {
u8g2.begin();
}
void loop(void) {
u8g2.firstPage();
do {
u8g2.setFont(u8g2_font_ncenB14_tr);
u8g2.drawStr(0,24,"Hello World!");
} while ( u8g2.nextPage() );
}
u8x8 character
- fast
- no RAM
- no graphics
- no all displays
2
void setup(void) {
u8x8.begin();
}
void loop(void) {
u8x8.setFont(u8x8_font_chroma48medium8_r);
u8x8.drawString(0,1,"Hello World!");
}
full buffer
- fast
- all graphics
- lot of RAM
F
void setup(void) {
u8g2.begin();
}
void loop(void) {
u8g2.clearBuffer();
u8g2.setFont(u8g2_font_ncenB14_tr);
u8g2.drawStr(0,20,"Hello World!");
u8g2.sendBuffer();
}
Aquesta taula continua cap a la dreta — desplaça-la o gira el mòbil.
-
- Example
- Connections (
4W_HW_SPI)-
OLED
Arduino
GND
GND
VCC
5V
CLK
D13
MOSI
D11
RES
D8
DC
D9
CS
D10
Aquesta taula continua cap a la dreta — desplaça-la o gira el mòbil.
-
- IDE: Examples / U8g2
- uncomment:
U8G2_SH1106_128X64_NONAME_F_4W_HW_SPI u8g2(U8G2_R0, /* cs=*/ 10, /* dc=*/ 9, /* reset=*/ 8);
- uncomment:
- Basic program
#include <Arduino.h>
#include <U8g2lib.h>
#include <SPI.h>
#include <Wire.h>
// free choice
#define PIN_CS 10
#define PIN_DC 9
#define PIN_RESET 8
// HW => CLK=D13, MOSI=D11
U8G2_SH1106_128X64_NONAME_F_4W_HW_SPI u8g2(U8G2_R0, PIN_CS, PIN_DC, PIN_RESET);
void setup(void) {
u8g2.begin();
}
void loop(void) {
u8g2.clearBuffer();
u8g2.setFont(u8g2_font_ncenB14_tr);
u8g2.drawStr(0,20,"Bon dia!");
u8g2.drawCircle(20, 40, 10);
u8g2.sendBuffer();
}
- Interfacing & displaying a custom graphic on an 0.96″ I2C OLED with Arduino
- Connections (
- Hardware SPI (use specific connections:
D13-SCLK--CLK, D11-MOSI--MOSI)
- u8glib
- u8g2
06Projectes / Projects#
- Modelisme
- Laboratori electrònica
- Generació de senyals / Signal generation
- Direct Digital Synthesis (DSS)
- Direct
Digital Synthesis (DDS) (Analog Devices)
-
shape max freq AD9833 sine, square, triangle 12.5MHz AD9910
Aquesta taula continua cap a la dreta — desplaça-la o gira el mòbil.
-
- Direct
Digital Synthesis (DDS) (Analog Devices)
- Arduino + DSS
- Direct Digital Synthesis (DSS)
- Generació de senyals / Signal generation
07ESP#
- Info
-
datasheet any /
yearprocessor nuclis velocitat (màx) ROM SRAM SPI flash WiFi Bluetooth logic built-in sensors GPIOs ADC DAC SPI UART I2C I2S Bus CAN ESP8266
2014 Tensilica LX106 single-core 80MHz 1 80MHz (160MHz)
160kB 16MiB
- 3.3V
16 1 (10-bit) 2 4 3 2 2 x ESP32 ESP32 Series 2016 Tensilica Xtensa X36 2 160MHz (240MHz)
512kB 16MiB x v4.2 BR/EDR + BLE 3.3V - hall effect
- [temperature sensor]
36 18 (12-bit) 2 (8-bit) 4 3 2 2 x (2.0) ESP32-S2
ESP32-C3 ESP32-C3 Series 2020 RISC-V 1 (160MHz) 384KB 400KB
x 5.0 LE
22 2 (12-bit) - 3 2 1 1 - ESP32-S3 ESP32-S3 Series
Aquesta taula continua cap a la dreta — desplaça-la o gira el mòbil.
- RAM (s3lcd firmware)
4M 8M 16M no SPIRAM
- M5Stack Atom-S3
- T-Dongle-S3
quad SPIRAM - T-QT Pro
- T-Embed
- WT21-SC01 Plus
- M5Stack CoreS3
octal SPIRAM
- T-Display S3
- T-HMI
- ESP32-S3-Box
- ESP32-S3-Box Lite
Aquesta taula continua cap a la dreta — desplaça-la o gira el mòbil.
- WiFi setup
- SmartConfig
- Info
- Android
- Codi
- EspressifApp / EsptouchForAndroid
- Apps
- Codi
- Ús / Usage
- Passos / Steps
- ...
- ...
- Passos / Steps
- Desenvolupament / Development
- SmartConfig
- Desenvolupament / Development
- C / C++
-
Arduino-ESP32 ESP-IDF + Arduino-ESP32 ESP-IDF (Espressif IoT Development Framework)
Es programa com si fos un Arduino (setup+loop) Pot funcionar de totes dues maneres: setup+loop o bé app_main Només accepta app_main()
També és el que MicroPython fa servir1. install
core from- Linux
- ...
- Arduino IDE
- PlatformIO
ESP-IDF
- Arduino as an ESP-IDF component
- menuconfig
- Autostart Arduino setup and loop on
boot
- off: app_main()
- on: setup(), loop()
- Autostart Arduino setup and loop on
boot
- Linux
- Standard
Toolchain Setup for Linux and macOS
(ESP32-S3,
...)
mkdir -p ~/esp && cd ~/espgit clone --recursive https://github.com/espressif/esp-idf.git- this will install master to: ~/esp/esp-idf/ (~1,9 GiB)
- if you need a specific version
(e.g. when building lv_micropython):
- directly clone specific
version (e.g. v5.2.2):
git clone -b v5.2.2 --recursive https://github.com/espressif/esp-idf.git
- or checkout master (previous
step) and then checkout to
version and update submodules:
git checkout v5.2.2git submodule update --init --recursive
- directly clone specific
version (e.g. v5.2.2):
cd esp-idf./install.sh [esp32s3]- will create and install:
~/.espressif/(~2,3 GiB)idf-env.json, containing all targets (or only those specified as install.sh arguments):esp32p4, esp32c3, esp32s3, esp32c5, esp32c2, esp32c6, esp32h2, esp32, esp32s2, esp32c61dist/- tar versions to be installed in tools/
tools/xtensa-esp-elf-gdb/riscv32-esp-elf-gdb/xtensa-esp-elf/riscv32-esp-elf/esp32ulp-elf/openocd-esp32/esp-rom-elfs/
python_env/idf5.4_py3.10_env/- will contain all python packages, needed by ...
- will create and install:
. ./export.sh- this step will be needed each time you compile ESP-IDF projects (e.g. micropython, ...)
- Standard
Toolchain Setup for Linux and macOS
(ESP32-S3,
...)
- Eclipse
Plugin
- Espressif > Download and Configure
ESP-IDF
- Choose a directory to download
ESP-IDF to: ~/esp/
- this will install to: ~/esp/esp-idf-v5.0/
- or: use an existing ESP-IDF
directory from file system
- Choose existing ESP-IDF directory: ~/esp/esp-idf/
- Choose a directory to download
ESP-IDF to: ~/esp/
- Espressif > Download and Configure
ESP-IDF
- VSCode Extension
- Espressif IDE
2. install
tools from
- Linux
cd ~/esp/esp-idf/./install.sh all- will install tools to: ~/.espressif/
- Eclipse
- installed automatically after installing ESP-IDF, or
- Espressif > ESP-IDF Tools Manager
> Install Tools
- ESP-IDF Directory:
~/esp/esp-idf-v5.0/
- will install tools to: ~/.espressif/
- ESP-IDF Directory:
~/esp/esp-idf-v5.0/
main myproject.ino (C++)
void setup(){
Serial.begin(115200);
while(!Serial){
; // wait for serial port to connect
}
}
void loop(){
Serial.println("loop");
delay(1000);
}
(Autostart Arduino setup and loop on boot: off)
main.c or main.cpp
#include "Arduino.h"
extern "C" void app_main()
{
initArduino();
// Arduino-like setup()
Serial.begin(115200);
while(!Serial){
; // wait for serial port to connect
}
// Arduino-like loop()
while(true){
Serial.println("loop");
}
// WARNING: if program reaches end of function app_main() the MCU will restart.
}
main.cpp
#include "Arduino.h"
void setup(){
Serial.begin(115200);
while(!Serial){
; // wait for serial port to connect
}
}
void loop(){
Serial.println("loop");
delay(1000);
}
my_project.c (automatically created by idf.pycreate-project
#include <stdio.h>
void app_main(void)
{
}
3. setup variables
- Linux (Step 4. Set up the Environment Variables)
source $HOME/esp/esp-idf/export.sh- will set, for the present terminal:
IDF_PATH=~/esp/esp-idf- expand PATH with tools (e.g.
idf.py)
- will set, for the present terminal:
- Eclipse
- Espressif > Download and Configure
ESP-IDF
- will set:
- Preferences > C/C++ >
Build > Environment
- IDF_PATH
- IDF_PYTHON_ENV_PATH
- ...
- Preferences > C/C++ >
Build > Environment
- will set:
- Espressif > Download and Configure
ESP-IDF
4. new project
- CLI (Step
5. First Steps on ESP-IDF)
cd ~/esp- from example
cp -r $IDF_PATH/examples/get-started/hello_world .cd ~/esp/hello_world
- brand new:
idf.pycreate-project my_project
- Eclipse
- Window > Perspective > Reset Perspective...
- File > New > Espressif IDF Project
5. build and
flash project
- CLI
cd ~/esp/my_projectidf.py set-target esp32s3idf.py menuconfig- to set WiFi SSIFD and credentials:
- ...
- to set WiFi SSIFD and credentials:
- idf.py build
- idf.py -p /dev/ttyACM0 flash
- Eclipse
- Build
- Run
6. monitor project
tutorials - Tutorials
- Basic Tutorial
- Blink.ino
- use 38 (TFT backlight) instead of LED_BUILTIN
- Blink.ino
- ...
- Basic Tutorial
examples
dir Arduino IDE examples examples dirs in .../espressif/arduino-esp32/libraries/ File > Examples > Examples for ESP32S3 Dev Module - TFT_eSPI
- ...
~/Arduino/libraries/ File > Examples > Examples from Custom Libraries
~/Arduino/T-Display-S3/example/ File > Sketchbook > T-Display-S3 Aquesta taula continua cap a la dreta — desplaça-la o gira el mòbil.
- espressif/esp-idf/examples
Aquesta taula continua cap a la dreta — desplaça-la o gira el mòbil.
- Linux
- IDE
- Arduino IDE: ESP32
- Platform IO
- ESP-IDF
(Espressif IoT Development Framework)
- ESP-IDF
Programming Guide
- espressif / esp-idf
- can also be installed from idf-eclipse-plugin
examples/
- espressif / esp-idf
- Eines / Tools
idf.py- activate it:
- ...
- Plugins for IDE
- idf-eclipse-plugin
- Installation
- Eclipse plugin
- Help -> Install New
Software -> Add...
- Name: Espressif IDF Plugin for Eclipse
- Location: https://dl.espressif.com/dl/idf-eclipse-plugin/updates/latest/
- Help -> Install New
Software -> Add...
- ESP-IDF
- Espressif (entre Run i Window)
-> ESP-IDF Manager -> (top
right button) Add ESP-IDF
- (primera vegada) Choose a
directory to download
ESP-IDF to: /home/.../esp/
- this will install to: ~/esp/esp-idf-v5.0/
- (si ja el teniu) Use an
existing ESP-IDF directory
from file system
- Choose existing ESP-IDF directory: /home/.../esp/esp-idf/
- Problemes / Problems
Cannot run program "null/bin/python" (in directory "/"): error=2, El fitxer o directori no existeix
- (primera vegada) Choose a
directory to download
ESP-IDF to: /home/.../esp/
- Install Tools
- same as performed by install.sh when manually installing ESP-IDF
- this will install, in
~/.espressif/
- dist/
- riscv32-esp-elf-gdb-...
- clang-esp-...
- cmake-...
- ninja-linux-...
- qemu-xtensa-softmmu-esp_develop_...
- tools/
- riscv32-esp-elf-gdb/
- esp-clang/
- cmake/
- ninja/
- qemu-xtensa/
- dist/
- automatically done. If not:
- Installing ESP-IDF Tools
- Problems / Problemes
Copying File: /home/.../.espressif/tools/openocd-esp32/v0.12.0-esp32-20240726/openocd-esp32/bin/../share/openocd/contrib/60-openocd.rules to destination: /etc/udev/rules.d/60-openocd.rules
Unable to copy rules for OpenOCD to system directory, try running the eclipse with sudo command- Solució / Solution
- sudo
cp
/home/.../.espressif/tools/openocd-esp32/v0.12.0-esp32-20240726/openocd-esp32/bin/../share/openocd/contrib/60-openocd.rules /etc/udev/rules.d/60-openocd.rules
- sudo
cp
- Solució / Solution
- Espressif (entre Run i Window)
-> ESP-IDF Manager -> (top
right button) Add ESP-IDF
- Eclipse plugin
- Uninstallation
- Help -> About Eclipse IDE -> Installation details -> Installed software ->
- search for "esp"
- select ESP-IDF ...
- Uninstall (bottom right button)
- Ús / Usage
- open C/C++ perspective
- Window -> Perspective -> Reset perspective...
- Create
a new project
- File -> New -> Espressif IDF Project
- New Launch Target: ESP Target
- Name: mytarget_esp32s3
- IDF Target: esp32s3
- Serial Port: /dev/ttyACM0
- Serial console
- (top icon) Open a Terminal (Shift+Ctrl+Alt+T)
- Problemes / Problems
- IDF Eclipse plugin 2.7.0
Errors occurred during the build.
Errors running builder 'CDT Core Builder' on project 'hello_world'.
'int com.espressif.idf.core.build.IDFBuildConfiguration.watchProcess(java.lang.Process, org.eclipse.cdt.core.resources.IConsole)'- Eclipse version 2022-12 is not supported. Use version 2022-09 instead or update to IDF Eclipse plugin 2.9.1
- IDF Eclipse Plugin does not yet support Eclipse CDT 2022-12 (IEP-826) #654
- IDF Eclipse plugin 2.7.0
- Installation
- idf-eclipse-plugin
- ESP-IDF
Programming Guide
- Exemples
- WiFi
- fixed
#include <WiFi.h>
const char* ssid = "xxxxxxxxxx";
const char* password = "xxxxxxxxxx";
void setup(void) {
Serial.begin(115200);
WiFi.begin(ssid, password);
while (WiFi.status() != WL_CONNECTED) {
delay(500);
Serial.print(".");
}
Serial.println("");
Serial.println("Connected");
Serial.println(WiFi.localIP());
}
- SmartConfig
- ...
- fixed
- Comunicació / Communication
- Gràfics / Graphics
- LVGL
- T-Display-S3 / libvgl
- Interactive demos
- Documentation
- ...
- TFT
#include "TFT_eSPI.h" /* Please use the TFT library provided in the library. */
TFT_eSPI lcd = TFT_eSPI();
TFT_eSprite sprite = TFT_eSprite(&lcd);
- LVGL
- WiFi
-
- MicroPython
- Info
- Instal·lació / Installation
- Install ESP-IDF
- Build the firmware or get it
-
project
drivers info last modified built firmware build (e.g. for T-Display S3) install firmware
install libs (thonny: upload to /) tft examples
General instructions:
- install ESP-IDF
- clone micropython repo
- clone driver repo
- update the git submodules and compile the MicroPython cross-compiler (generate mpy files)
- copy py files to be included in the firmware as frozen
- build micropython firmware
micropython -
MicroPython port to the ESP32
- Install ESP-IDF SDK
- versions
micropython esp-idf master v5.0.2 v1.20.0 v4.4.5 v1.19.0
Aquesta taula continua cap a la dreta — desplaça-la o gira el mòbil.
- follow general instructions to install ESP-IDF
- checkout specific version
- every session:
source export.sh
- versions
- clone micropython repo
cd ~/srcgit clone https://github.com/micropython/micropython.git
- pre-compile some of the built-in
scripts to bytecode
cd ~src/micropythonmake -C mpy-cross
- build micropython firmware (e.g.
for board
esp32-s3)
cd ~src/micropythoncd ports/esp32make submodulesmake BOARD=GENERIC_S3-
make idf.pyBOARD=GENERIC_S3-D MICROPY_BOARD=GENERIC_S3-D MICROPY_BOARD_DIR=.../micropython/ports/esp32/boards/GENERIC_S3-B build-GENERIC_S3
USER_C_MODULES=.../micropython.cmake-D USER_C_MODULES=.../micropython.cmake
FROZEN_MANIFEST=...-D MICROPY_FROZEN_MANIFEST=...
(removed from v1.18)
FROZEN_MPY_DIR=
Aquesta taula continua cap a la dreta — desplaça-la o gira el mòbil.
-
- ...
- poseu el dispositiu en mode bootloader / put device in bootloader mode
- seguiu les instruccions que es
mostren quan ha acabat de compilar /
follow the instructions printed
after build is complete:
- susbtituïu / replace
-p (PORT)per / by-p /dev/ttyACM0)
- susbtituïu / replace
- reset amb el botó físic / reset with physical button
- verifiqueu amb / verify with
lbuque / micropython-builder - extmod/
- display/
- lcd
- st7789
- framebuf1
- ...
- display/
- Dependències / Dependencies
- Mageia
sudo dnf install git make python3 python3-pip cmake quilt
- Mageia
cd ~/srcgit clone https://github.com/lbuque/micropython-builder.gitcd micropython-builderln -s config_T-DisplayS3 config- make
- board dirs will be created at:
/disc/src/micropython-builder/target/esp32s3/boards/- LILYGO_T-DisplayS3/
- ...
- micropython git submodule is automatically installed to:
micropython-builder/build_dir/esp32s3/micropython/- micropython build is called
(from
/disc/src/micropython-builder/build_dir/esp32s3/micropython/ports/esp32)
with:
idf.py-D MICROPY_BOARD=LILYGO_T-DisplayS3 -B /disc/src/micropython-builder/build_dir/esp32s3/build-LILYGO_T-DisplayS3 -DUSER_C_MODULES=/disc/src/micropython-builder/extmod/micropython.cmake -D EXTMOD_FROZEN_DIR=/disc/src/micropython-builder/extmod -D MICROPY_BOARD_DIR=/disc/src/micropython-builder/target/esp32s3/boards/LILYGO_T-DisplayS3 build
- put device in bootloader mode
cd build_dir/esp32s3/build-LILYGO_T-DisplayS3/esp-idf/esptool_py~/.espressif/python_env/idf4.4_py3.8_env/bin/python ../../../esp-idf/components/esptool_py/esptool/esptool.py -p /dev/ttyACM0 erase_flash- seguiu les instruccions que es
mostren quan ha acabat de compilar /
follow the instructions printed
after build is complete:
- susbtituïu / replace
-p (PORT)per / by-p /dev/ttyACM0)
- susbtituïu / replace
- reset amb el botó físic / reset
with physical button
miniterm /dev/ttyACM0 115200CTRL-DMicroPython v1.19-dirty on 2023-08-09; LILYGO T-DisplayS3 with ESP32S3
(firmware in:micropython-builder/build_dir/esp32s3/build-LILYGO_T-DisplayS3/firmware.bin)- ...
- micropython-builder/
- build_dir/esp32s3/
- lcd_binding_micropython/examples
- (ok)
- st7789/examples/
- Problemes
ImportError: no module named 'st7789'
- Problemes
- lcd_binding_micropython/examples
- build_dir/esp32s3/
- devbis / st7789_mpy
- install ESP-IDF sdk
- clone micropython repo
- clone st7789 repo
cd ~/src
git clone https://github.com/devbis/st7789_mpy.git
- ERROR: només hi ha st7789_mpy/st7789/micropython.mk; no micropython.cmake
- toto.py
import st7789
- russhughes / st7789_mpy
- based on devbis/st7789_mpy
- added features
2024/06/09
- toto.py
import st7789
- russhughes / st7789py_mpy
- based on devbis/st7789_mpy
- support
- 320x240, 240x240, 135x240, 182x128
- RGB and BGR color orders
- display rotation
- hardware based scrolling
- ...
2024/08/05
- toto.py
import st7789py as st7789
- - russhughes / st7789s3_mpy
- see russhughes/s3lcd for a much faster version
2024/03/20
- install ESP-IDF sdk
- first time
cd ~/srcgit clone -b v4.4 --recursive https://github.com/espressif/esp-idf.git
git clone -b v5.0.2 --recursive https://github.com/espressif/esp-idf.gitcd esp-idf/git pull
- next times
cd ~/src/esp-idf/git checkout v4.4git checkout v5.0.2git submodule update --init --recursive
./install.shsource export.sh
- first time
- clone micropython repo
cd ~/srcgit clone https://github.com/micropython/micropython.git
- clone st7789 driver repo
cd ~/srcgit clone https://github.com/russhughes/st7789s3_mpy.git
- Update the git submodules and
compile the MicroPython
cross-compiler (generate mpy files):
cd ~/src/micropythongit submodule update --init- will update sumbmodules in
micropython/lib/
- will update sumbmodules in
cd mpy-cross/makecd ..cd ports/esp32
- copy py files to be included in
the firmware as frozen:
cp ../../../st7789s3_mpy/fonts/bitmap/vga1_16x16.py modulescp ../../../st7789s3_mpy/fonts/truetype/NotoSans_32.py modulescp ../../../st7789s3_mpy/fonts/vector/scripts.py modules
- build micropython firmware
cd ports/esp32
make USER_C_MODULES=../../../st7789s3_mpy/st7789/micropython.cmake FROZEN_MANIFEST="" FROZEN_MPY_DIR=$UPYDIR/modules- ...
- ...
- poseu el dispositiu en mode bootloader / put device in bootloader mode
- firmware
- provided firmware
- cd s3lcd/firmware/
- T-Display S3
source ~/.espressif/python_env/idf5.0_py3.8_env/bin/activateesptool.py --port /dev/ttyACM0 erase_flash
esptool.py --chip esp32s3 --port /dev/ttyACM0 write_flash -z 0x000 firmware.bin- reset button
miniterm.py /dev/ttyACM0
                          115200
CTRL-D
- MicroPython v1.19.1-896-g2e4dda3c2-dirty on 2023-02-26; ESP32S3 module (spiram) with ESP32S3
- built firmware
- ...
- provided firmware
- ...
- st7789s3_mpy/
- examples/
- tft_config.py
- tft_buttons.py
- examples/
- toto.py
import st7789- import tft_config
- - russhughes / s3lcd
- faster than st7789s3_mpy
- work in progress
- based on devbis/st7789_mpy
- added features
2024/03/20
- install ESP-IDF sdk (v4.4.5) and source export:
- clone micropython repo (v1.20.0)
- clone s3lcd driver repo
cd ~/src-
git clone https://github.com/russhughes/s3lcd.git
- Update the micropython git
submodules and compile the
MicroPython cross-compiler:
cd ~/src/micropythongit submodule update --init- will update sumbmodules in
micropython/lib/
- will update sumbmodules in
cd mpy-cross/makecd ..cd ports/esp32
- copy py files to be included in
the firmware as frozen:
cd ports/esp32/modules- fonts
- bitmap
ln -s ../../../../s3lcd/fonts/bitmap/vga1* .ln -s ../../../../s3lcd/fonts/bitmap/vga2* .
- truetype
- vector
- bitmap
- build micropython firmware (for
T-Display S3:
GENERIC_S3_SPIRAM_OCT):cd ports/esp32make BOARD=GENERIC_S3_SPIRAM_OCT USER_C_MODULES=/disc/src/s3lcd/src/micropython.cmake FROZEN_MANIFEST="" FROZEN_MPY_DIR=$UPYDIR/modules- specifying a relative path
in USER_C_MODULES does not
work
- specifying a relative path
in USER_C_MODULES does not
work
- poseu el dispositiu en mode bootloader / put device in bootloader mode
- firmware
- provided firmware
- cd s3lcd/firmware/
- T-Display S3
source ~/.espressif/python_env/idf5.0_py3.8_env/bin/activate
cd S3LCD_OCT_16M
esptool.py --port /dev/ttyACM0 erase_flash
esptool.py --chip esp32s3 --port /dev/ttyACM0 write_flash -z 0x000 firmware.binminiterm.py /dev/ttyACM0 115200
CTRL-D
- MicroPython v1.20.0-dirty on 2023-05-14; ESP32S3 (S3LCD_OCT_16M) with ESP32S3
- built firmware (see previous
column):
- seguiu les instruccions que
es mostren quan ha acabat de
compilar / follow the
instructions printed after
build is complete:
- susbtituïu / replace
-p (PORT)per / by-p /dev/ttyACM0)
- susbtituïu / replace
- seguiu les instruccions que
es mostren quan ha acabat de
compilar / follow the
instructions printed after
build is complete:
s3lcd/firmware/S3LCD_OCT_16M/firmware.bin
- s3lcd/
- examples/
- configs/
- t-display-s3/
- tft_config.py
- tft_buttons.py
- t-display-s3/
- configs/
- examples/
- s3lcd/
- toto.py
import s3lcd- import tft_config
lv_micropython
(forked from micropython)
ports/esp32
- Install ESP-IDF
SDK v5.2.2
- versions ("The ESP-IDF changes
quickly and MicroPython only
supports certain versions.
Currently MicroPython
supports:")
lv_micropython esp-idf
v5.0.4
v5.0.5
v5.1.2
v5.2.0
v5.2.2 Aquesta taula continua cap a la dreta — desplaça-la o gira el mòbil.
- follow general instructions to install ESP-IDF
- checkout specific version (e.g. v5.2.2)
- every session:
source
                                                export.sh
- versions ("The ESP-IDF changes
quickly and MicroPython only
supports certain versions.
Currently MicroPython
supports:")
- clone lv_micropython repo (clone
of micropython)
cd ~/src- git clone https://github.com/lvgl/lv_micropython.git
- cd lv_micropython
- git submodule update --init --recursive
- ? git submodule update --init --recursive lib/lv_bindings
- pre-compile some of the built-in
scripts to bytecode
cd ~src/lv_micropythonmake -C mpy-cross
- build micropython firmware (e.g.
for board
esp32-s3)
cd ~src/lv_micropythoncd ports/esp32make submodulesmakeBOARD=ESP32_GENERIC_S3- this will create:
- ~/src/lv_micropython/ports/esp32/build-ESP32_GENERIC_S3/
- bootloader/bootloader.bin
- firmware.bin
- ...
- ~/src/lv_micropython/ports/esp32/build-ESP32_GENERIC_S3/
- this will create:
- poseu el dispositiu en mode bootloader / put device in bootloader mode
- seguiu les instruccions que es
mostren quan ha acabat de compilar /
follow the instructions printed
after build is complete:
- susbtituïu / replace
-p
                                                  (PORT)
per / by-p /dev/ttyACM0)idf.py-p /dev/ttyACM0 flash
- susbtituïu / replace
- reset amb el botó físic / reset with physical button
- verificació de la comunicació via
port sèrie / verify with
- miniterm.py
ampy -p /dev/ttyACM0 ls --recursive- ...
lvgl_micropython
- no need to clone micropython explicitely
- clone
git clone https://github.com/kdschlosser/lvgl_micropython- this will clone the
following repos under lib/:
- micropython
- lvgl
- esp-idf
- pycparser
- SDL
- this will clone the
following repos under lib/:
- compile for Lilygo T-Display-S3 (Using
the display with LVGL &
MicroPython #243):
cd lvgl_micropythonpython make.py {build target} [{build options}] [{target options}] [{global options}]- {build_target}: esp32, macOS, stm32, unix, rp2, renesas-ra, nrf, mimxrt, samd
- {build_options}: clean
- {target_options}
- {model/variant}: coverage, minimal, nanbox, standard (default)
- {model/variant
specific options}:
- ESP32
options
- BAUD=...
- PORT=...
- deploy
- --skip-partition-size=...
- ...
- ESP32-S3
options
- --octal-flash
- ESP32-S2,
ESP32-S3, ESP32-C3
and ESP32-C6
options
- ...
- ESP32
options
- {global_options}
- {input/output}
- {other}
python make.py esp32 submodules clean mpy_cross BOARD=ESP32_GENERIC_S3 BOARD_VARIANT=SPIRAM_OCT DISPLAY=st7789- error: no rule for mpy_cross
python make.py esp32 BOARD=ESP32_GENERIC_S3 BOARD_VARIANT=SPIRAM_OCT DISPLAY=st7789
- poseu el dispositiu en mode bootloader / put device in bootloader mode
- seguiu les instruccions que es
mostren quan ha acabat de compilar /
follow the instructions printed
after build is complete:
- susbtituïu / replace
-p (PORT)per / by-p /dev/ttyACM0)
- susbtituïu / replace
- reset amb el botó físic / reset with physical button
- verificació de la comunicació via
port sèrie / verify with
- miniterm.py
- help()
LVGL (9.2.2) MicroPython (1.24.1) Binding compiled on 2025-04-17; Generic ESP32S3 module with Octal-SPIRAM with ESP32S3
- help()
ampy -p /dev/ttyACM0 ls --recursive
- miniterm.py
- exemple
Aquesta taula continua cap a la dreta — desplaça-la o gira el mòbil.
- Lilygo
- lbuque/micropython-builder
- Compilació / Compilation
cd ~/srcgit clone https://github.com/lbuque/micropython-builder.gitcd micropython-builder- T-DisplayS3
ln -s config_T-DisplayS3 config
make
- Instal·lació / Installation
cd micropython-builder/build_dir/esp32s3/build-LILYGO_T-DisplayS3/esp-idf/esptool_py- poseu el dispositiu en mode bootloader
~/.espressif/python_env/idf4.4_py3.8_env/bin/python ../../../esp-idf/components/esptool_py/esptool/esptool.py -p /dev/ttyACM0 erase_flash
Project build complete. To flash, run this command:
~/.espressif/python_env/idf4.4_py3.8_env/bin/python ../../../esp-idf/components/esptool_py/esptool/esptool.py -p/dev/ttyACM0-b 460800 --before default_reset --after no_reset --chip esp32s3 write_flash --flash_mode dio --flash_size detect --flash_freq 80m 0x0 ../../../build-LILYGO_T-DisplayS3/bootloader/bootloader.bin 0x8000 ../../../build-LILYGO_T-DisplayS3/partition_table/partition-table.bin 0x10000 ../../../build-LILYGO_T-DisplayS3/micropython.bin- Problemes / Problems
The filesystem appears to be corrupted. If you had important data there, you
may want to make a flash snapshot to try to recover it. Otherwise, perform
factory reprogramming of MicroPython firmware (completely erase flash, followed
by firmware programming).- Solució / Solution
- Perform
a previous
erase_flash
- Perform
a previous
- Problemes / Problems
- ...
- Compilació / Compilation
- lilygo-micropython
- IMPORTANT: use lbuque/micropython-builder instead
- T-DisplayS3
- Dependències / Dependencies
- Mageia
sudo dnf install git
                                                      make python3 python3-pip
                                                      cmake quilt
- Mageia
cd ~/srcgit clone https://github.com/Xinyuan-LilyGO/lilygo-micropython.git- cd lilygo-micropython
cp config_T-DisplayS3 configmake...- Problemes / Problems
CMake Error at /home/.../src/lilygo-micropython/extmod/display/lcd/src/micropython.cmake:3 (include):
include could not find load file:
/home/.../src/lilygo-micropython/build_dir/esp32s3/build-LILYGO_T-DisplayS3/../lcd_binding_micropython/lcd/micropython.cmake- degut a:
make[1]: entering dir '/home/.../src/lilygo-micropython/extmod/display/lcd'
Download lcd_binding_micropython-59bbbdae5ecc9ae84b986ce54c089250a13cb768.tar.gz over git
S'està clonant a «lcd_binding_micropython»...
remote: Enumerating objects: 531, done.
remote: Counting objects: 100% (9/9), done.
remote: Compressing objects: 100% (4/4), done.
remote: Total 531 (delta 5), reused 5 (delta 5), pack-reused 522
S'estan rebent objectes: 100% (531/531), 324.27 KiB | 1.72 MiB/s, fet.
S'estan resolent les diferències: 100% (272/272), fet.
fatal: la referència no és un arbre: 59bbbdae5ecc9ae84b986ce54c089250a13cb768- perquè
cd ~/src/lilygo-micropython/tmp/dl/lcd_binding_micropythongit checkout 59bbbdae5ecc9ae84b986ce54c089250a13cb768
fatal: la referència no és un arbre: 59bbbdae5ecc9ae84b986ce54c089250a13cb768
- Solució / Solution:
- degut a:
- ...
- Dependències / Dependencies
- st7789s3_mpy: MicroPython
driver for the TTGO T-Display-S3 st7789
display
cd ~/src/- git clone https://github.com/russhughes/st7789s3_mpy.git
- s3lcd: ESP_LCD
MicroPython driver for ESP32-S3 Devices
with ST7789 or compatible displays.
- faster than st7789s3_mpy
- beta
cd ~/src/- git clone https://github.com/russhughes/s3lcd.git
- Supplied firmware
- cd
s3lcd/firmware/
- T-Display S3
source
                                                          ~/.espressif/python_env/idf5.0_py3.8_env/bin/activate
cd S3LCD_OCT_16M
esptool.py
                                                          --port /dev/ttyACM0
                                                          erase_flash
esptool.py
                                                          --chip esp32s3 --port
                                                          /dev/ttyACM0
                                                          write_flash -z 0x000
                                                          firmware.bin
- T-Display S3
- cd
s3lcd/firmware/
- lbuque/micropython-builder
- LVGL
- IDE
- SquareLine Studio (comercial)
- EEZ
Studio (Envox)
- eez-open / studio
- lvgl gui builder
- GUI Guider
- lv_micropython
(forked from micropython)
- Dependències / Dependencies
- Mageia
- ...
- Mageia
- Instal·lació
cd ~/srcgit clone ...- ...
- Dependències / Dependencies
- lvgl_micropython
- exemples
- main.py (Lilygo T-Display S3)
from micropython import const
import lcd_bus
import st7789
import lvgl as lv
import task_handler
import machine
# T-Display S3: https://lilygo.cc/products/t-display-s3
# display bus settings
_FREQ = const(20000000)
LCD_DC = const(7)
LCD_WR = const(8)
LCD_D0 = const(39)
LCD_D1 = const(40)
LCD_D2 = const(41)
LCD_D3 = const(42)
LCD_D4 = const(45)
LCD_D5 = const(46)
LCD_D6 = const(47)
LCD_D7 = const(48)
LCD_RD = const(9)
LCD_CS = const(6)
rd = machine.Pin(LCD_RD, machine.Pin.OUT)
rd.value(1)
cs = machine.Pin(LCD_CS, machine.Pin.OUT)
cs.value(0)
display_bus = lcd_bus.I80Bus(
dc=LCD_DC,
wr=LCD_WR,
# cs=_CS,
freq=_FREQ,
data0=LCD_D0,
data1=LCD_D1,
data2=LCD_D2,
data3=LCD_D3,
data4=LCD_D4,
data5=LCD_D5,
data6=LCD_D6,
data7=LCD_D7
)
lv.init()
# display settings
_WIDTH = const(170)
_HEIGHT = const(320)
LCD_BL = const(38)
LCD_PWR = const(15)
LCD_RES = const(5)
display = st7789.ST7789(
data_bus=display_bus,
# let the driver handle the frame buffers
frame_buffer1=None,
frame_buffer2=None,
display_width=_WIDTH,
display_height=_HEIGHT,
backlight_pin=LCD_BL,
power_pin=LCD_PWR,
reset_pin=LCD_RES,
reset_state=st7789.STATE_LOW,
color_space=lv.COLOR_FORMAT.RGB565,
offset_y=35,
color_byte_order=st7789.BYTE_ORDER_BGR,
rgb565_byte_swap=True,
)
display.set_power(True)
display.init()
#display.invert_colors()
display.set_backlight(100)
# Lets get it displaying before we worry about rotation
display.set_rotation(lv.DISPLAY_ROTATION._90)
scrn = lv.screen_active()
scrn.set_style_bg_color(lv.color_hex(0x000000), 0)
slider = lv.slider(scrn)
slider.set_size(100, 50)
slider.center()
label = lv.label(scrn)
label.set_text("Ei, canalla!")
label.set_pos(0,0)
th = task_handler.TaskHandler()
- IDE
- ...
-
- Pujada del microprogramari cap al dispositiu /
Upload firmware to device
- engegueu el
dispositiu en mode bootloader:
- lsusb en mode normal:
ID 303a:4001 Espressif Systems Espressif Device
- premeu botó RST + botó del costat (dels dos botons auxiliars, el que hi ha més a prop d'RST)
- deixeu anar RST
- deixeu anar el botó del costat
- comproveu amb lsusb que el dispositiu ara
està en mode bootloader
ID 303a:1001 Espressif USB JTAG/serial debug unit
- lsusb en mode normal:
- si heu compilat el microprogramari
idf.pybuildidf.py -D MICROPY_BOARD=GENERIC_SPIRAM buildidf.py flash
- si l'heu baixat ja compilat:
source ~/.espressif/python_env/idf5.0_py3.8_env/bin/activate- cd ...
esptool.py --port
                                                        /dev/ttyACM0 erase_flash
esptool.py --chip esp32s3 --port /dev/ttyACM0 write_flash -z 0x000 firmware.bin
- ...
- engegueu el
dispositiu en mode bootloader:
- Verificació de la comunicació
via port sèrie
- un cop dins (p.ex. amb screen):
import machine
# backlight led
pin38 = machine.Pin(38, machine.Pin.OUT)
pin38.value(1)
pin38.value(0)
- execució d'un programa python local en el
dispositiu, sense haver-lo d'instal·lar:
- ampy -p /dev/ttyACM0 run main.py
- un cop dins (p.ex. amb screen):
- IDE
- Thonny
- Tools -> Options
- ...
- View -> Files
- From This Computer
- select file s3lcd/examples/configs/t-display-s3/tft_config.py
- Upload to /
- From This Computer
- Tools -> Options
- Thonny
- Eines / Tools
- pujada de programes / upload programs
- ampy (Adafruit MicroPython tool)
- Intall ampy
pip install --user adafruit-ampy
- list existing files in esp32 device:
ampy -p /dev/ttyACM0 ls
                                                  --recursive
- run a local file in device, without
uploading it:
ampy -p /dev/ttyACM0
                                                      run main.py
- upload python program (e.g. main.py) to
esp32 device:
ampy -p /dev/ttyACM0
                                                      put main.py
- Intall ampy
- mpremote
- ...
- Thonny
- ampy (Adafruit MicroPython tool)
- rshell
(Remote MicroPython Shell)
- Instal·lació / Installation
pip install rshell
- Ús / Usage
rshell -p /dev/ttyACM0- ls -l /pyboard
- repl
- CTRL+X to exit
- ...
- Instal·lació / Installation
- pujada de programes / upload programs
- Libraries
-
library differences from standard Standard
array
asyncio
binascii
builtins
cmath
collections
errno
...
MicroPython-specific
bluetooth
btree
cryptolib
deflate
framebuf
machine
micropython
neopixel
network
openmap
uctypes
vfs
Port-specific ESP8266, ESP32 esp
esp32
RP2040 rp2
...
Aquesta taula continua cap a la dreta — desplaça-la o gira el mòbil.
- Exemples / Examples
- shelly-fpm / shelly-python
- How To Run A Program At Boot
- lbuque/lcd_binding_micropython examples
- russhughes/st7789s3_mpy examples
- russhughes/s3lcd examples
- WiFi
- Configuring the WiFi and using the board
- rtc via ntp
import network

                                      from machine
                                      import RTC

                                      from ntptime import settime


                                      def wlan_connect(ssid='MYSSID',
                                      password='MYPASSWORD'):

                                          wlan =
                                      network.WLAN(network.STA_IF)

                                          if not wlan.active() or
                                      not wlan.isconnected():


                                      wlan.active(True)


                                      print('connecting to:', ssid)


                                      try:


                                      wlan.connect(ssid, password)


                                      except Exception as e:


                                      print(e)


                                      while not wlan.isconnected():


                                      pass

                                          print('network
                                      config:', wlan.ifconfig())


                                      def main():

                                          # connect to WLAN

                                          wlan_connect()


                                          # real-time clock

                                          rtc = RTC()


                                          # set time from NTP

                                          settime()


                                          # year, month, day,
                                      weekday, hours, minutes, seconds,
                                      subseconds


                                      print("{}".format(rtc.datetime()))


                                      main()
- ...
- Gràfics / Graphics
- TFT
- min_tft.py
import
                                          vga1_bold_16x32 as font

                                          import tft_config

                                          import s3lcd


                                          def main():

                                              try:


                                          tft =
                                          tft_config.config(tft_config.WIDE)


                                          tft.init()


                                          text = "toto"


                                          xpos = 20


                                          ypos = 100


                                          fg = s3lcd.WHITE


                                          bg = s3lcd.BLACK


                                          tft.text(font, text, xpos, ypos, fg,
                                          bg)


                                          tft.show()


                                              finally:


                                          tft.deinit()


                                          main()
- ntp_tft.py
- ...
- min_tft.py
- LVGL
- LVGL MicroPython
- ...
- TFT
- Processos
- Projectes
- espLCD
- ...
- ...
- ...
- C / C++
- ...
- ESP8266
- ESP
- Info
- ESP8266 (wp)
- ESP8266 Community Forum
- Projectes amb Raspberry Pi
- Luís Llamas
- Programarfacil
- Prometec
- Maquinari / Hardware
- Mòduls / Modules (SoC +
antena)
-
components marca model pins SoC memòria antena Expressif ESP-WROOM-02
...
Ai-Thinker ESP-01
...
ESP-12
ESP8266 16Mbit x
ESP-12E 22
x Aquesta taula continua cap a la dreta — desplaça-la o gira el mòbil.
-
- Plaques de desenvolupament / Development boards (mòdul
+ sèrie/USB + ...)
- Mòduls / Modules (SoC +
antena)
- Programari / Software
- Arduino IDE
- Fitxer -> Preferències
- URL addicionals de gestor de plaques:
- Fitxer -> Preferències
- Arduino IDE
- ...
- ESP32
- Maquinari / Hardware
- Gadgets (Build in public)
-
marca model variant MCU flash PSRAM pantalla touch BT connector bateria LiPo preu github info
capsa Lilygo T-Display-S3 - non soldered [H569]

- soldered [H577]

- touch non-soldered [H587]

- touch soldered [H589]

- with grey [K206] / black [K204] shell

ESP32-S3R8 16MB 8MB 1.9" TFT 170x320 (CST816) BLE 5 + BT mesh JST 1.25mm 2P T-Display-S3 - as set
- T-Display S3 Shell
T-Display S3 Pro 
ESP32-S3R8 16MB 8MB 2.33" 222x480
ST7796capacitive
T-Embed - black, white, transparent, orange

ESP32-S3 16MB 8MB 1.9" TFT 170x320
BLE 5 JST 1.25mm 2P
T-Embed
T-Pico C3

RP2040 (blue)
4MB
1.14" TFT
135x240 ST7789V
-
JST 1.25mm 2P
T-PicoC3
T-Display case
ESP-32-C3 (green)
T-Pico Pro 
RP2040 16+4MB 264kB+512kB 2.33" 222x480 ST7796
ESP-32-C6
T-Display RP2040
RP2040
...
T4 
4MB 8MB 2.2" / 2.4"
240x320
V4.2+BLE
T4 S3
(opt: with shell)- with shield

ESP32-S3R8
2.41"
450x600
T-Panel S3 - Lite S3

ESP32-S3 16MB 8MB 4" 460x460 capacitive
- RS485

ESP32-S3 + ESP32-H2 16+4MB 8MB 4" 480x480
T5 e-Paper 
16MB 8MB 4.7" 540x960 (touch)
Aquesta taula continua cap a la dreta — desplaça-la o gira el mòbil.
- non soldered [H569]
- T-Display-S3 (old)
- Desenvolupament
- Programari
- Volos
- Xinyuan-LilyGO
- T-Display-S3
cd ~/Arduinogit clone https://github.com/Xinyuan-LilyGO/T-Display-S3.git- install TFT_eSPI
library (standard one does not work),
which contains micky_commit.patch
cd ~/Arduino/librariesln -s ../T-Display-S3/lib/TFT_eSPI .
- other libraries provided by
T-Display-S3:
cd ~/Arduino/librariesln -s ../T-Display-S3/lib/TFT_eSPI .- ln -s ../T-Display-S3/lib/TouchLib .
- ln -s ../T-Display-S3/lib/OneButton .
- ln -s ../T-Display-S3/lib/lvgl .
- ln -s ../T-Display-S3/lib/Arduino_GFX .
- pinout
- exemples / examples
- factory
(factory reset)
- pin_config.h
- #define WIFI_SSID "MySSID"
- #define WIFI_PASSWORD "my_password"
- ...
- #define PIN_BUTTON_1 0
- #define PIN_BUTTON_2 14
- ...
- pin_config.h
- factory
(factory reset)
- T-Display-S3
- T-Pico C3
- ...
- ESP32-BOX
- M5Stack
- Info
- ...
- AZ-Touch MOD Wandgehäuseset mit 2,4 Zoll Touchscreen für ESP8266 und ESP32 kompatibel mit Arduino
- ...
- Programari / Software
- Volos
-
maquinari vídeo: @VolosProjects codi: VolosR TDisplay-S3 Bar Graph - Programming Tutorial (TFT_eSPI library) (6 nov. 2022) GraphTutorial TDisplay-S3
NewTTGOAnalogReadings
cd ~/Arduinogit clone https://github.com/VolosR/NewTTGOAnalogReadings.git- Open Arduino IDE
- set your wifi credentials in
NewTTGOAnalogReadings.ino
const
                                                  char* ssid = "xxxxxxxxxx";

                                                  const char* password =
                                                  "xxxxxxxxxx";
- set your wifi credentials in
NewTTGOAnalogReadings.ino
T-Display S3 PRO Let's make Number Dial (Programming Tutorial) (9 gen. 2024) NumberDialTUT T4 S3 Monitoring House Power Consumption with ESP32 and Shelly Power Meter (Shelly) (11 abr. 2024) T4Shelly
Aquesta taula continua cap a la dreta — desplaça-la o gira el mòbil.
-
- ...
- Volos
- ...
- Maquinari / Hardware
- ...
08MicroPython#
- Python
- Info
- MicroPython
- micropython / micropython
- MicroPython documentation
- ...
- MicroPython
- Instal·lació / Installation
- Mòduls / Modules
- Instal·lació / Installation
- Package management
- micropython-lib
- Opcions principals (Usage)
- mip
import mipmip.install("uaiohttpclient")
- mpremote
mpremote connect /dev/ttyUSB0 mip
                                  install package-name
- freeze into firmware
- copy the files manually
mpremote connect /dev/ttyUSB0 cp
                                  python-stdlib/base64/base64.py :/lib
- mip
- mòduls disponibles
help("modules")- ...
- Instal·lació / Installation
- Exemples
- HTTP
- requests
import mip

                              mip.install("requests")
- 5.2. HTTP GET request
- requests
- websockets
- JSON-RPC
- ...
- HTTP
- ...
09Mòduls / Modules#
| família | tipus | model | interfície / interface |
biblioteques / libraries | projectes |
|---|---|---|---|---|---|
| entrada | sensor distància | HC-SR04 | |||
| sensor de moviment | PIR HC-SR501 | ||||
| sensor de temperatura | AM2302 (DHT22) | ||||
| acceleròmetre | MMA7361 | ||||
| ECG | AD8232 | ||||
| rellotge RTC | DS3231 | ||||
| rotary encoder | Octopus OBEncoder | ||||
| sortida | relé | 5v | |||
| motors | L298N | ||||
| pantalla | LCD | 16x2 LCM1602 IIC V1 | I2C | ||
| OLED | 1.3" SSH1106 (128x64) | SPI | |||
| comunicació | bluetooth | HC-06 |
Aquesta taula continua cap a la dreta — desplaça-la o gira el mòbil.
http://www.francescpinyol.cat/arduino.html
Primera versió: / First version: 29.XII.2017
Darrera modificació: 7 d'agost de 2026 / Last update: 7th August
2026